Table of Contents
We use SSH protocol to access Linux Ubuntu servers. (Ubuntu server 22.04) Users use SSH connection with default settings. However, this usage brings security risks. If the IP address of the server you SSH to is a public IP, this poses a much greater risk. In this article, we will examine how we can secure our SSH connection.
We start by disabling the root user’s SSH access and creating a user with root privileges. Closing the root user is one of the defense strategies that will prevent attackers from reaching their goal. Ubuntu and many other Linux distributions provide this during the first installation phase. If we do not have a user with root privileges, we create a new user. Let this user be muscal.
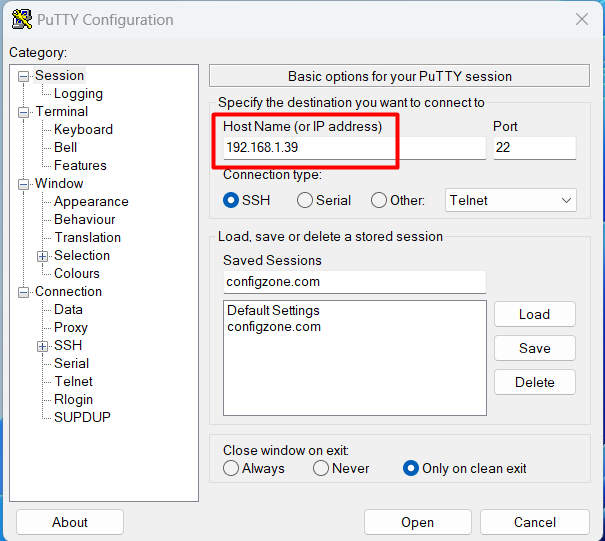
Let’s connect to our server with SSH. This will be our last insecure connection. My server is installed on Vmware on my computer. IP address 192.168.1.39
Step 1 – Create a New User
We create a new user. It also creates a folder under the home folder for the user we created with the -m token. After entering the command, it asks us for a password. We create a new user by entering the password of the logged in user.
configzone@configzone:~$ sudo useradd -m muscal
[sudo] password for configzone:
Step 2 – Set a Password for New User
With the passwd command, we create a password for the newly created muscal user. The passwords you give to users should be complex and difficult to guess.
configzone@configzone:/home$ sudo passwd muscal
New password:
Retype new password:
passwd: password updated successfully
Using the usermod command, we add the newly created user (muscal) to the admin group.
configzone@configzone:/home$ sudo usermod -aG sudo muscal
Step 3 – Edit /etc/ssh/sshd_config
In this file /etc/ssh/sshd_config we have a few operations to do. First, we set the PermitRootLogin line to no. Just below this line, we add AllowUsers muscal as configzone. I want both of my users to SSH, so before I do anything, I copy my existing config file by adding .old, it’s a good habit.
configzone@configzone:/home$ sudo cp /etc/ssh/sshd_config /etc/ssh/sshd_config.old
configzone@configzone:/home$ sudo nano /etc/ssh/sshd_config
#LoginGraceTime 2m
PermitRootLogin no
AllowUsers muscal configzone
#StrictModes yes
#MaxAuthTries 6
#MaxSessions 10
Step 4 – Restart SSHD Service
Finally, we restart the SSH service with systemctl restart sshd. Since the commands require authorization, I proceed by putting sudo at the beginning of all commands. If you want, you can proceed by getting su authorization before such operations. This way you don’t need to type sudo every time.
sudo systemctl restart sshdStep 5 – Test
Now in this step I am going to make a new ssh connection. I am using Putty for ssh connection, you can use another program if you want.


$ pwd
/home/muscal
After logging in, type pwd to see our directory. As you can see, our directory is /home/muscal and that directory is found when we log in.
#LoginGraceTime 2m
PermitRootLogin no
AllowUsers muscal configzone
#StrictModes yes
MaxAuthTries 5
MaxSessions 5
I set MaxAuthTries as 5 in the code line below. So if you can enter incorrectly 5 times, then the session will be renewed.I set the maximum number of sessions with MaxSessions 5. You can adjust it according to the number of people authorized to access.
there are two important points in the ssh configuration. Maximum number of attempts and maximum number of sessions. It is necessary to edit these. By default these lines are passive.
In this blog post, we set the SSH user access permission, so only the users we allow will be able to access SSH. We also set the maximum number of sessions and maximum number of false attempts for SSH connection. Don’t allow specific IP addresses in the next post. Setting path by user, we will change the default SSH pot 21.
