Table of Contents
FTP (File Transfer Protocol) is a standard way of transferring files between computers over a network. FTP allows you to upload and download files, create and delete directories, and manage file permissions on a remote server. In this blog post, I will show you how to enable FTP server on Ubuntu Server using the vsftpd package.
Step 1: First, let’s update the system packages.
sudo apt updateStep2: Install vsftpd
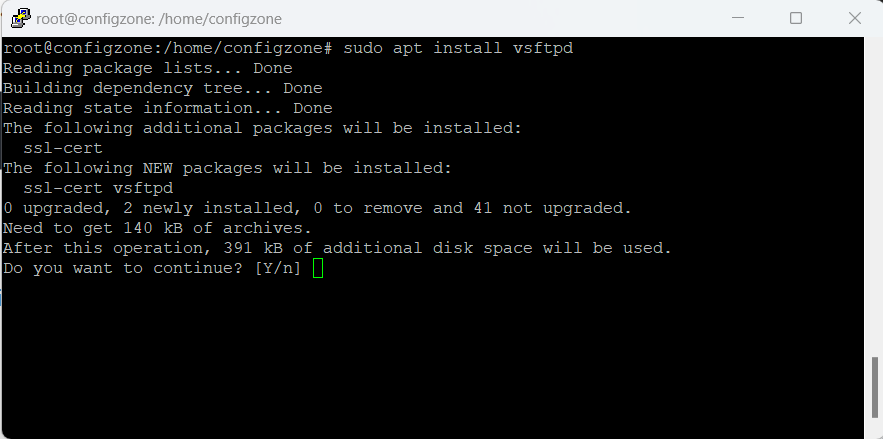
vsftpd (Very Secure FTP Daemon) is a popular and secure FTP server for Linux systems. To install it, open a terminal and run the following command:
sudo apt install vsftpdHere we type YES (y) and continue with enter.

Step 3: Configure vsftpd
The main configuration file for vsftpd is /etc/vsftpd.conf. You can edit it with any text editor of your choice, but make sure to back up the original file before making any changes. For example, you can use nano to edit the file:
sudo cp /etc/vsftpd.conf /etc/vsftpd.conf.bak
sudo nano /etc/vsftpd.conf
There are many options that you can customize in this file, but here are some of the most important ones:
– anonymous_enable: This option determines whether anonymous users can access the FTP server. Set it to NO if you want to disable anonymous access.
– local_enable: This option determines whether local users can access the FTP server. Set it to YES if you want to enable local access.
– write_enable: This option determines whether users can write to the FTP server. Set it to YES if you want to allow users to upload and modify files.
– chroot_local_user: This option determines whether local users are confined to their home directories. Set it to YES if you want to increase security and prevent users from accessing other parts of the system.
– pasv_enable: This option determines whether passive mode is enabled. Passive mode is a way of establishing data connections that works better with firewalls and routers. Set it to YES if you want to enable passive mode.
– pasv_min_port and pasv_max_port: These options determine the range of ports that are used for passive mode connections. You can choose any range that is not used by other services, but make sure to open these ports in your firewall if you have one.
Here is an example of a basic configuration file that allows local users to access the FTP server in passive mode with chroot enabled:
anonymous_enable=NO
local_enable=YES
write_enable=YES
chroot_local_user=YES
pasv_enable=YES
Step 4: Restart vsftpd
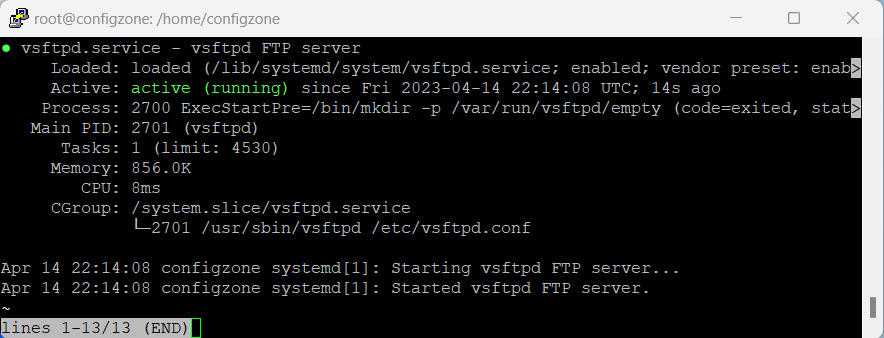
sudo systemctl restart vsftpdAfter making any changes to the configuration file, you need to restart the vsftpd service for them to take effect. You can do this by running the following command:
sudo systemctl status vsftpd
Step 5: Check your ip address.
ifconfig

root@configzone:/home/configzone# ifconfig
ens33: flags=4163<UP,BROADCAST,RUNNING,MULTICAST>  mtu 1500
        inet 192.168.1.39  netmask 255.255.255.0  broadcast 192.168.1.255
        inet6 fe80::20c:29ff:fe5a:feb6  prefixlen 64  scopeid 0x20<link>
        ether 00:0c:29:5a:fe:b6  txqueuelen 1000  (Ethernet)
        RX packets 26287  bytes 35604405 (35.6 MB)
        RX errors 0  dropped 0  overruns 0  frame 0
        TX packets 10617  bytes 1023518 (1.0 MB)
        TX errors 0  dropped 0 overruns 0  carrier 0  collisions 0
Step 6: Test FTP Server
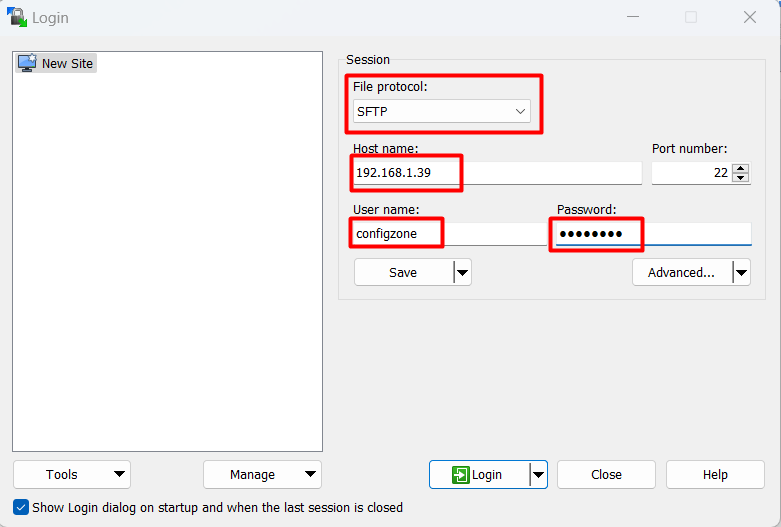
To test your FTP server, you can use any FTP client of your choice, such as FileZilla or WinSCP. You will need to enter the following information:
– Host: The IP address or hostname of your Ubuntu server
– Username: The username of a local user on your Ubuntu server
– Password: The password of the local user on your Ubuntu server
– Port: 21 (the default port for FTP)
You should be able to connect to your FTP server and see your home directory.


You can then upload and download files, create and delete directories, and change file permissions as you wish.
Congratulations! You have successfully activated FTP server in Ubuntu using vsftpd. I hope this blog post was helpful and informative. If you have any questions or feedback, please leave a comment below.
