Table of Contents
Firefox is a popular web browser that is available for various operating systems, including Ubuntu Linux. In this blog post, I will show you how to install Firefox on Ubuntu step by step, using different methods. You can choose the method that suits you best, depending on the source of Firefox and whether you prefer to use the graphical user interface or the command line.
Method 1: Install Firefox from the Ubuntu Software Manager
if you haven’t installed ubuntu yet, you can read our article about the ubuntu installation from this link.
This is the easiest and most recommended way to install Firefox on Ubuntu, as it ensures that you get the latest version of Firefox that is compatible with your system and has all the security updates. To install Firefox from the Ubuntu Software Manager, follow these steps:

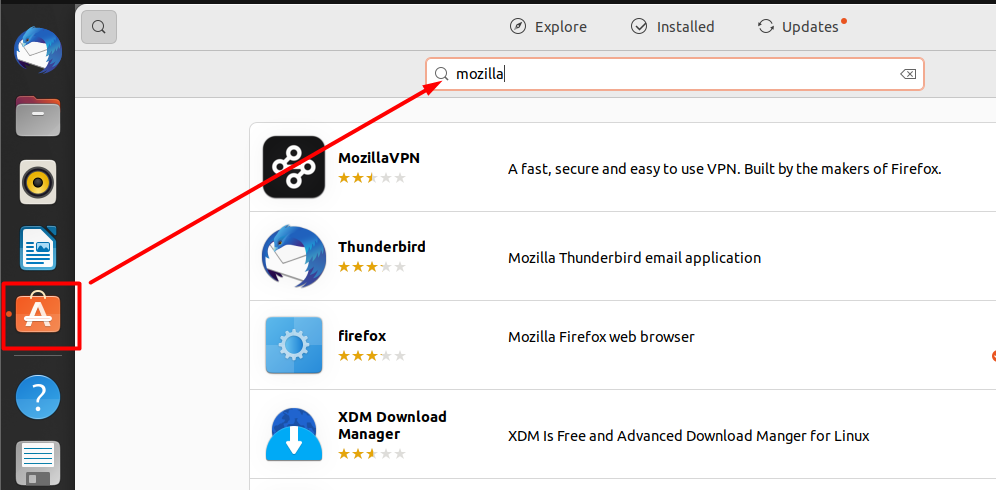
– Open the Ubuntu Software Manager by clicking on its icon in the dock or searching for it in the applications menu.
– Click on the search icon and type “Firefox” in the search bar. You should see an entry for Firefox with a green check mark, indicating that it is available from the official Ubuntu repository.
– Click on the Firefox entry and then click on the Install button. You may be asked to enter your password to confirm the installation.
– Wait for the installation to complete. You can see the progress in the Ubuntu Software Manager window.
– Once the installation is done, you can launch Firefox from the dock or the applications menu.
Method 2: Install Firefox from the command line using apt
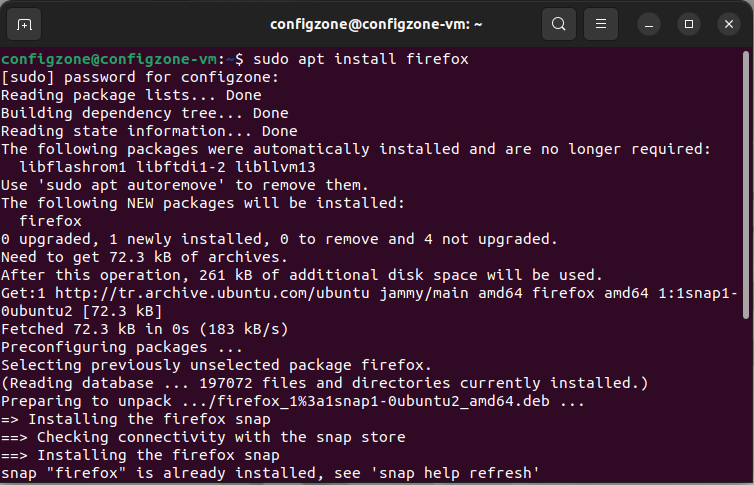
If you prefer to use the command line, you can also install Firefox using apt, which is a tool for managing software packages on Ubuntu. To install Firefox using apt, follow these steps:
– Open a terminal window by pressing Ctrl+Alt+T or searching for “terminal” in the applications menu.
– Type the following command and press Enter:
sudo apt update
sudo apt install firefox
– You may be asked to enter your password to confirm the installation.
– Wait for the installation to complete. You can see the progress in the terminal window.
– Once the installation is done, you can launch Firefox by typing firefox in the terminal or from the dock or the applications menu.
Method 3: Install Firefox from a third-party repository using apt
Another way to install Firefox on Ubuntu is to use a third-party repository that provides newer or alternative versions of Firefox. For example, you can use the Mozilla PPA repository, which offers beta and nightly builds of Firefox. To install Firefox from a third-party repository using apt, follow these steps:
– Open a terminal window by pressing Ctrl+Alt+T or searching for “terminal” in the applications menu.
– Add the repository to your system by typing the following command and pressing Enter: sudo add-apt-repository ppa:ubuntu-mozilla-security/ppa
– You may be asked to enter your password and press Enter again to confirm adding the repository.
– Update your system’s package list by typing the following command and pressing Enter: sudo apt update
– Install Firefox from the repository by typing the following command and pressing Enter: sudo apt install firefox
– Wait for the installation to complete. You can see the progress in the terminal window.
– Once the installation is done, you can launch Firefox by typing firefox in the terminal or from the dock or the applications menu.
Method 4: Install Firefox from a downloaded file using tar
The last method to install Firefox on Ubuntu is to download a file from Mozilla’s website and extract it to your system. This method gives you more control over which version of Firefox you want to install, but it also requires more manual steps and may not be compatible with your system’s libraries. To install Firefox from a downloaded file using tar, follow these steps:
– Go to mozilla and click on Download Now button. Choose a language and a platform (Linux 64-bit or Linux 32-bit) and save the file to your Downloads folder.
– Open a terminal window by pressing Ctrl+Alt+T or searching for “terminal” in the applications menu.
– Go to your Downloads folder by typing cd ~/Downloads and pressing Enter.
– Extract the contents of the downloaded file by typing tar xjf firefox-*.tar.bz2 and pressing Enter. This will create a folder called firefox in your Downloads folder.
tar xjf firefox-*.tar.bz2– Move the firefox folder to your home folder by typing mv firefox ~/ and pressing Enter.
– Launch Firefox by typing ~/firefox/firefox in the terminal.
Note: To update or uninstall Firefox installed using this method, you will need to repeat these steps with a newer or older file from Mozilla’s website. Alternatively, you can delete the firefox folder from your home folder.
