Table of Contents
The computer name must have been determined before the Active Directory installation, IPv4 must have a fixed IP address. In addition, we can also choose to turn off the firewall.
You can follow how to do it in the steps below.
Active Directory Setup
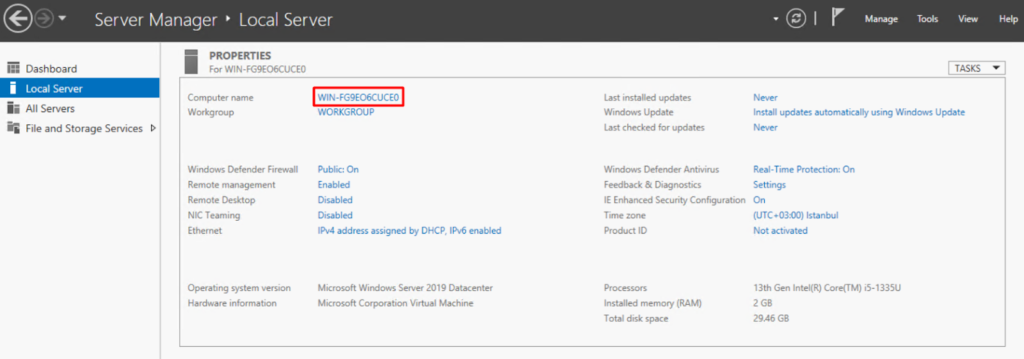
Step 1: We change the computer name in “Server Manager > Local Server”. Since this machine will be an Active Directory machine, we can name it DC, which stands for Domain Controller.

When we click on the computer name as in the first image, we click the Change button in the window that appears.

In the small window that opens, we can change the Computer name field to DC. After clicking OK, the computer will be restarted. The computer is restarted for the changes to be processed in the machine.


Step 2: After the computer restarts, the server needs to be given a static IP. Click on Ethernet in Server Manager > Local Server.

Right click on Ethernet in the window that opens and open Properties.

Double click on “Internet Protocol Version 4” to open a small window.

We can set our IP address as 10.10.10.10/24. The 127.0.0.1 entered in DNS represents the machine itself.

We have completed all the settings of our machine before the Active Directory installation.

Step 3: After setting all configurations, click Add roles and Features in Server Manager > Dashboard.

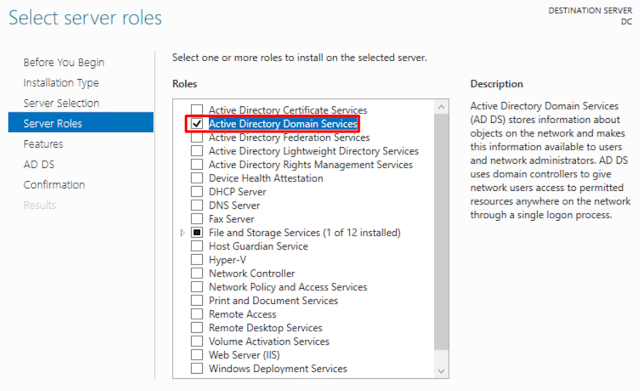
Step 4: Select Active Directory Domain Service from the window that opens and confirm the other features to be added.


Step 5: The installation process is started with Install.

Step 6: After the installation is complete, we need to complete the installation of the service.
Click Promote this server to a domain controller.

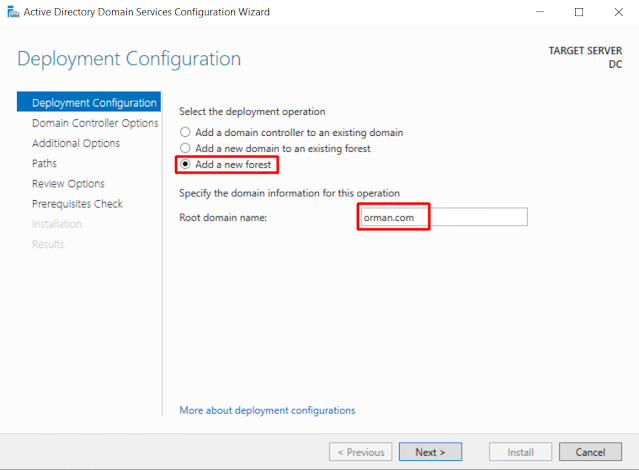
Step 7: Since we want to create a new domain from the window that opens, the name of the domain is configured by selecting “Add a new forest”.

Step 8: The DSRM password is set. This password should not be forgotten.

Step 9: If it appears as “Everything is OK”, the installation is started with Install. The machine will restart during installation.

Step 10: You need to make sure that you are logging in to the server through the domain. If your domain name is not written in the Sign in to section, you can log in as Administrator@orman.com or ORMAN\Administrator.

You can check whether the machine is connected to the domain from the Local Server section.


2 thoughts on “Active Directory Setup – Windows Server 2019”